The Master Patient Index (MPI) contains a patient's demographic information and identifies each patient with a medical record number. NOTE: An MPI is required prior to admitting a new patient in the Admission screen.
To access the Master Patient Index window, go to Master Files > Master Patient Indexes. [+]
You can also access the MPI from the Registration window by clicking the New MPI or Edit MPI buttons located at the bottom of the window. See Working in the Registration Window for more information.
The following tasks can be performed from this screen:
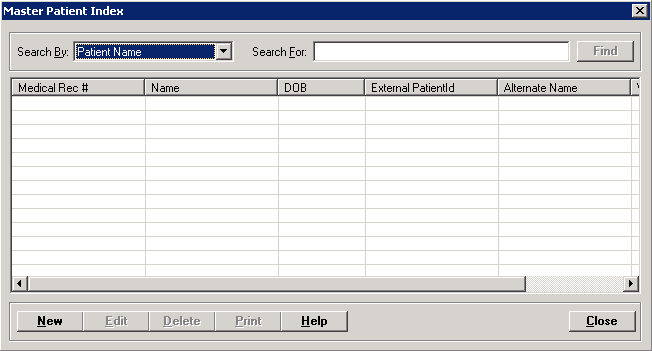
In the Search By field, use the drop-down list to select how you want to search the list and sort the results. Select from the following sort options:
Alternate Name
DOB
External PatientID
Medical Record #
Patient Name
Patient Name(Phonetic) - (sounds like)
Work Phone
The sort option defaults to Patient Name. A change to the sort option will be retained until you exit the screen.
In the Search For field, enter the specific term to search for based on the Search By field choice. Enter all or part of the term to retrieve all records that match the criteria.
Click Find to display the search results in the grid. Depending on the Search By field choice, the grid displays the patients by Patient Name in alphabetical order or by Medical Record Number in numerical order. You can click any column heading to sort the list based on that column. Click the column heading again to reverse the order (i.e., ascending or descending).
To find a merged MPI record, you must use the Medical Record Number search option to locate the merged record. Merged MPIs are displayed in red in the search results. To view the merged MPI, select the row of the MPI. The message, Medical Record Number XXXX has been Merged to YYYY, is displayed. Click OK. Click Edit to open the Edit MPI screen in view-only mode. Users are not allowed to add, edit, or remove any information on the screen.
Click New at the bottom of the Master Patient Index window. The Add Master Patient Index window is displayed. See New MPI for detailed instructions.
In the Master Patient Index window, find and select the patient that you want to edit.
Click Edit. The Edit Master Patient Index window is displayed.
If the MPI Comments Prompt box is checked in the System Parameters, the following alert is displayed when comments exist for the patient as entered on the Demographics tab of the MPI: MPI Comments on this patient: {comments as entered on the Demographics tab}. The alert is displayed one time only. Click OK to acknowledge the message and continue to the Edit Master Patient Index window.
Edit the fields as needed; refer to the field descriptions in New MPI.
When editing the MPI, the Images button and the Images-All Visits button are available for accessing the Document Management System to add/view images or documents for the patient. (NOTE: The All Visits option allows you to view a list of documents attached to all episodes for the patient.) When you are finished adding/viewing images, close the document viewer to return to the Edit MPI window. See About Document Management and FileBound for more information.
Upon editing and saving the MPI, the following message
is displayed if the guarantor is changed on the MPI without changing the
guarantor on the related episodes:
You have changed this
patient's guarantor from [last name, first name] to [last name, first
name]. The following episodes may need to be updated to reflect the new
guarantor:
[list of episodes]
Review the episodes in Patient Registration > Registration > Edit
Visit, and set the correct guarantor as needed.
Click OK, and review the related
episodes.
In the Master Patient Index window, find and select the patient that you want to edit.
Click Delete. A verification message is displayed.
Click Yes if you are sure you want to delete the patient's MPI record, or click No to keep it.
Follow the instructions below to display and/or print a list of MPIs on file.
In the Master Patient Index window, choose your search criteria and click Find to display the patient records that you want print. All records that are visible in the grid will be included in the report.
Click Print. The report is displayed in the Report Viewer where you can save the list to the PC/network or print the list to an assigned printer. See To preview the report for more information on options within the viewer.
Working in the Registration Window
Insurance Eligibility Verification
Patient Portal PIN/Registration