Various screens have reporting features, which allow you to generate, view, export, and print a report.
Reporting fields function like fields throughout the rest of the Centriq system: as drop-down selection lists, check boxes, etc.
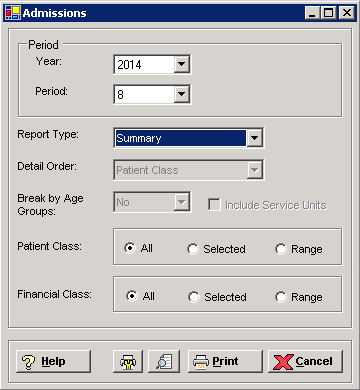
There is one reporting query you may not be familiar with. It allows you to narrow your reporting results in one of the following ways: All, Selected, Range, or Exclude.
All: Includes all available data in the results.
Selected: Displays a selection window for you to select one (distinct) value at a time to include in the report criteria.
Range: Allows entry of minimum and maximum values to include in the report criteria.
Exclude: Displays a selection window for you to select values to exclude from the report criteria. NOTE: Not all reports contain the Exclude option.
For example:
For the desired criteria, click the Selected radio button. The Selection window is displayed with a list of all available values, for example:
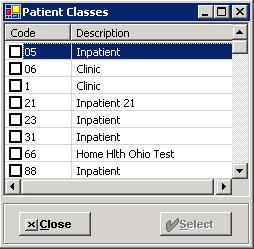
Check the boxes for the values you want to include in your report.
Click Close.
For the desired criteria, click the Range radio button. The Range window is displayed, for example:
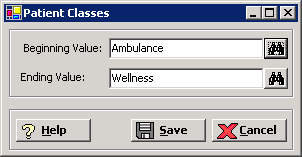
In the Beginning Value and Ending Value fields (or From/To fields), use the binoculars (or magnifying glass where applicable) to set the desired beginning and ending values for the report.
Click Save.
The Exclude feature is available in various Centriq applications.
For the desired criteria, click the Exclude radio button. The Selection window is displayed with a list of all available values.
Check the boxes for the values you want to exclude from your report.
Click Select.
After you have selected your report options, click the Print button (![]() ) to print to the default printer. If you want to preview the report before printing, click the
) to print to the default printer. If you want to preview the report before printing, click the ![]() (Print Preview) button. See To preview the report for more information. In some cases, you'll see a Generate button instead of a Print button, in which case the report is displayed on screen, similar to the Print Preview option.
(Print Preview) button. See To preview the report for more information. In some cases, you'll see a Generate button instead of a Print button, in which case the report is displayed on screen, similar to the Print Preview option.
The Print Options button (![]() ) allows you to:
) allows you to:
Select a local or network printer
Change the paper size and source (paper tray)
Change the orientation
Select the pages and number of copies to print
Click OK to save the settings and return to the report window.
Click the Print Preview button (![]() ) to display the report on your screen. The upper-left corner of the viewer provides the following tools:
) to display the report on your screen. The upper-left corner of the viewer provides the following tools:

The arrow buttons allow you to move around within the report. You can move to the first page, move back a page, move forward a page, or skip to the last page.
The printer button allows you to print the report.
The export button provides several options available for exporting your data. In the Export Report window, enter the file name, location, and file format (type), e.g., .pdf, .xls, .doc, .rtf.
The magnifier button or, in some cases, the percentage field allows you to zoom in and out. NOTE: The magnifier button here differs in functionality from the magnifying glass search button used in the entry screens.
The binoculars button allows you to search for specific text in the report.
To close the viewer, click the 'X' located in the upper-right corner of the viewer window.
Introduction to Application Help