 Patient
Communications Patient
Communications
Patient
Communications Patient
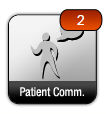
CommunicationsOne type of message that comes into the Patient Communications feature from the Patient Portal is Appointment Requests. If there are existing appointment requests, a red bubble with the quantity of alerts is displayed on the Main Landing page on the Patient Communications icon, as seen below. Click the icon to view the page and review the request. If the total number of communications for the count icon is = 0, the count icon will not display on the Patient Communications landing page icon.
The Patient Communications page displays communications between the patient and clinic staff and secure messaging between providers (internal and external). The page contains three tabs: All Patients, Specific Patient, and Unassigned Sec Msgs (This tab is only visible for Secure Messaging Users/Providers). The All Patients tab displays all communications for all patients. And, the Specific Patient tab displays all communications for a single patient. The Unassigned Sec Msgs tab displays messages received and allows the user to create new secure messages.
Patient Communication items with a status of New or In Progress will also be displayed in the Provider Work Center for the On Behalf Of provider.
The following topics are discussed on this page:
Working with Patient Communications
To print the Communication Report
The Modified Stage 2 and Stage 3 requirements for Eligible Providers for Measure #9: Secure Messaging criteria changed from requiring communications that were sent TO the provider FROM the patient (in Stage 2) to communications that contain clinically relevant information sent FROM the provider TO the patient. Due to this change, calculations and criteria have changed to accommodate the new requirements. In order for a communication to be included in the new secure messaging calculation, the communication must meet the following criteria:
Communication must be created by the provider
Communication must include clinically relevant information. To indicate that a communication includes clinically relevant information, check the Clinically Relevant check box for outgoing portal messages and replies. Outgoing lab result communications will be automatically designated as clinically relevant when they are created.
Communication must be a generic outgoing portal message, a reply to an incoming message that originated from the portal, or an outgoing lab result message.
The All Patients Tab contains two sections: Unassigned Communications and Assigned Communications. Unassigned communications are communications that have not been assigned to a staff member for handling/processing.
You can filter the All Patients tab by using the Type, Status, Assign Staff, and Date Range fields to filter the items displayed on this tab.
In addition, you can show previously removed communications by clicking the black expand button (in the right of the filter bar) and checking the Include Removed Communications box.
The Specific Patient Tab contains two sections. The Unassigned Communications section and the Assigned Communications. Unassigned communications are communications that have not been assigned to a staff member for processing. Assigned Communications are messages that have been assigned to this patient.
You can filter the Specific Patients tab by using the Type, Status, Assign Staff, and Date Range fields to filter the items displayed on this tab.
In addition, you can show previously removed communications by clicking the black expand button (in the right of the filter bar) and checking the Include Removed Communications box.
For the items listed on either of these two tabs, in both sections, you have the following options:
Attachments: If there is an attachment to the message, the attachment icon is displayed to the left of the item. To view the attachment, click the Show Communication Details button, then click the View Attachment button.
Show Details: Click this button to view details and history for the associated communication item. When the details are displayed, if the history section is not expanded, click the expand arrow to display the history information. For each item in the History section, you can view the associated log by clicking the Change Log button.
View Attachment: Click this button to view the attached document.
Download Attachment: Click this button to download the attached document to the local server or PC.
Import: If the message has an attachment, it can be imported into a patient record. Click the Import button. The Import Medical Summary box is displayed. Complete the fields for Source and File Description. Then, click Import and Reconcile to reconcile this document with the current patient record date. See To perform a Clinical Reconciliation for details. Or, click Import and Close.
Reply: Click Reply to reply to the message. The Secure Message Reply box is displayed. Enter the details in the Subject (if desired), Communication, and Status fields. Then, click Send. If the logged in user is not an activated secure message user, they cannot select themselves as the sender because they won't be listed in the From drop-down list.
Forward: Click Forward to forward the message to another secure message user. The Secure Message Forward box is displayed. Enter the details in the Forward To, Subject (if desired), Communication, and Status fields. Note: If the message is unassigned (has not been assigned to a patient), then the Patient and Visit fields can be completed to "assign" the message. Or, they can be left blank to leave the message unassigned. Then, click Send.
Edit Communication: Click the Edit button. The Edit Communication box is displayed. Update the information in the Communication field and then select a reason for editing in the Reason field. Click Save.
Remove a Communication: Click the Remove button. The Remove Communication box is displayed. Select a reason for removing the item in the Reason field and if desired, enter notes in the Comments box. Then, click Remove.
Acknowledge a Communication: Click the Acknowledge button. The Acknowledge Communication box is displayed. Select the appropriate Status: In Progress, Resolved, or New. (Note: The Status field is used to mark amendment requests as Approved or Denied.) If desired, enter notes in the Comments box, . Then, click Save. (Note: If the Assign Staff field is completed during the acknowledgement process, the item is moved from the Unassigned section to the Assigned section.)
Update a Communication/Assign Staff: Click the Update button. The Update Communication box is displayed. This box lets you update all the details of the communication and add comments and/or additional information to the original entry. This is where you assign staff for this communication and move it to the Assigned Communications section and route it to another provider/clinician. See To add a communication for details on each field.
To add a communications, click the Add Communication button. (If a patient has not been selected, you must access the Patient Specific tab to see the Add Communication button.) The Add Communication box is displayed.
In the Type field, select the type of communications you are adding. Note: The items in this list are customized by the facility in Maintenance > General Application Setup > Patient Communications.
If the patient has requested an amendment to the patient record, check the Amendment Request box. When this box is selected, the Area field is displayed. From the drop-down list, select the area of the patient record that the amendment is being requested.
In the On Behalf Of field, enter the name of the provider that the patient has communicated with. Type the first few letters of the name of the provider (or NPI number) and select it from the list of matches.
If the patient has a Primary Care Physician assigned, the Assign Staff field will populate with that information. If not, in the Assign Staff field, type the first few letters of the staff person's name and select it from the list of matches.
The Status field defaults to New. To change the status, select the appropriate status of the communication: New, In progress, or Resolved. If this is an amendment request (Amendment Request box is checked in Step 3), then the available status options are New, In Progress, Approved, or Denied.
In the Visit field, use the drop-down list to select the visit that the communication pertains to, if applicable.
In the Communication field, enter the details regarding the communication between the patient and the Hospital, ED, or Clinic.
Click Save.
To print the Patient Communications Report, click the Print button located at the top right of the page.
This tab displays secure messages that need to be assigned to providers and is used to create new secure messages. Secure messages are provider to provider messages using secure messaging technology to ensure the validity of the recipient. Setup is required to use this feature. See Maintenance > Secure Messaging for details.
You can filter the Unassigned Sec Msgs tab by using the Date Range and Message Type fields to filter the items displayed on this tab.
When viewing messages in the list, you can perform several actions on the message: Show Details, Remove the message, and Update the Message. These actions can be performed using the buttons located to the right of the item.
Show Secure Message Details: Click this button view additional information about the message including the message text, and any attachments. Attachments can be downloaded and/or viewed using the Download Attachment button or View Attachment button. In addition, you can import (pulls the patient data contained in the attachment into the Patient Chart > Medical Summary), reply, and forward the messages, if desired.
Remove Secure Message: Click this button to remove the message from the list. A Remove Secure Message box is displayed. Click Remove. (Note: Removed messages can be viewed after removal by selecting Removed in the Message Type filter at the top of the page.)
Then, click Save.
Secure messages can be sent to other providers or to patients. Secure messages are messages sent using secure messaging technology to ensure the validity of the recipient. To create a new secure message, click New Secure Msg from the Unassigned Sec Msgs tab or the Patient Specific tab. The New Secure Message box is displayed.
Note: Only registered patients can receive messages within the portal. If a patient is not registered in the portal, the New Secure Msg button is disabled on the Patient Specific tab.
To send a secure message with an attachment, locate the Medical Summary on the Medical Summary > Generated Medical Summaries page and click Export. One of the options in the Export Type field is Secure Message. Select this type to create a secure message with Medical Summary attached. For additional details, see the Medical Summary topic.
User security is required to grant/restrict access to the New Secure Msg button. Go to User Administration > Master Files > User Roles and locate the "New Portal Message" options for Hospital, ED, and/or Clinic.
Using the Shortcut Tabs: Search, Demographics, Summary, and Allergy |