Patient Portal (InteliChart)
Healthland has partnered with a third party vendor, InteliChart, to
provide patient portal functionality to our facility's patients. This
functionality is a core measure in Stage 2 Meaningful Use criteria: Core Measure #6: Patient
Electronic Access: View, download, and transmit.
The use of the Patient Portal, powered by InteliChart,
requires setup and licensing. Contact your Healthland Account Representative
for details.
The patient's clinical record can be uploaded to the Patient Portal
from the Medical Summary page. See Medical
Summary for details.
Quick Registration and PHR/Patient Portal
In Quick Registration, the patient's email address is entered. This
field is required is the facility is licensed with the patient portal
functionality. When saved, the patient information and patient data is
updated into the patient portal. In addition, if the Register
PHR Access box is checked, the registration process is initiated
when you click Save on the Quick
Registration page. See Quick
Registration for additional details.
In the Registration group on the main page, you can launch the Practice
Portal by clicking the Practice Portal
button. This displays the Practice Portal in a new web browser page. The
Practice Portal is used to set up and maintain the practice preferences
and settings.
Patient Communications and PHR/Patient Portal
When patients are using the Patient Portal functionality, they have
the ability to send/receive messages to the provider, including appointment
requests and referral requests. These messages are displayed in the Physician
Work Center and the Patient Communications application within one hour
of being sent. See Patient
Communications for details.
Physician Work Center and PHR/Patient Portal
Using the Patient Portal, the patient has the ability to send/receive
messages to his/her provider. When sent to the physician/provider, these
messages are displayed in the Physician Work Center. See Physician
Center for details.
In the Work Center group on the main page, you can launch the Physician
Portal by clicking the Physician Portal
button. This displays the Practice Portal in a new web browser page.
To register/activate
a patient for the Portal
For patient's to have access to their record, they must complete the
registration/enrollment process. This process usually starts at the clinic
(or hospital) while the patient is there, e.g. at the time of discharge
or the check out process in the clinic.
- Log in to the Practice Portal. (Note: If you have multiple companies,
make sure to select the correct company from the drop-down list in
the black bar at the top of the page.)
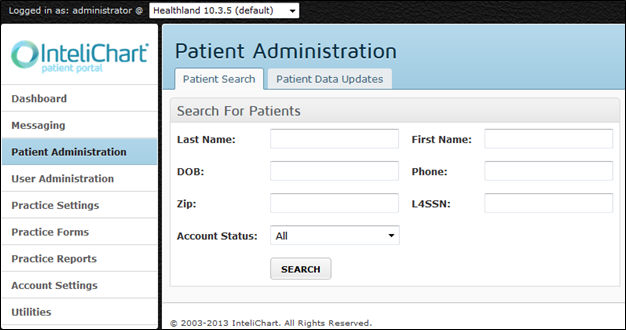
- Go to Patient Administration.
The Patient Search tab is displayed. [+]
- Type in the patient's last name and/or date of birth in the fields
provided and click Search
to locate the desired patient. Matches to the criteria you entered
are displayed at the bottom of the page. [+]
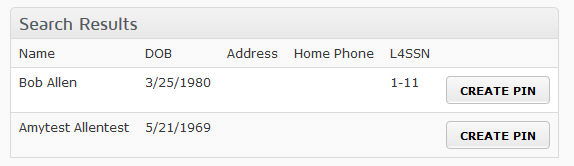
- Locate the correct patient and click CREATE
PIN. (Note: If the patient has already received a PIN, you
will see a SELECT PATIENT button instead of CREATE PIN. You can click
SELECT PATIENT to access the CREATE PIN button.)
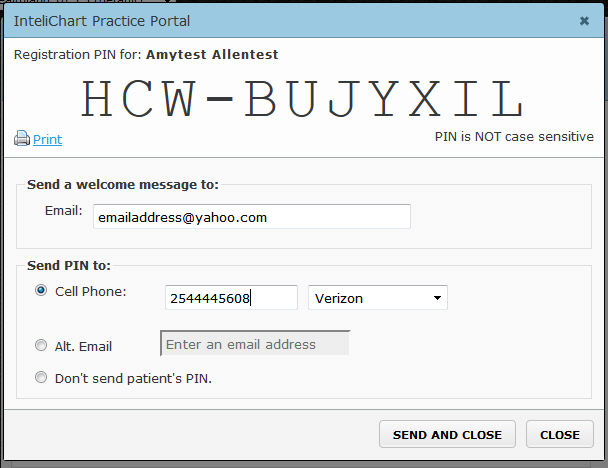
- The PIN window is displayed. [+]
This window contains the PIN and several options about how to send
it to the patient:
- In the Send a welcome message
to field, enter the patient's Email address so that they
will receive a copy of the PIN via Email.
- To send the PIN via text message, click the Cell
Phone option, enter the patient's cell phone number and
mobile provider.
- If you wish to sent to an alternate Email address, click Alt. Email and enter the appropriate
Email address.
- Or, if the patient doesn't wish to receive the PIN, click the
Don't send patient's PIN option.
- You can print a copy of the PIN to provide to the patient
by clicking the Print
button in the top left corner of the window.
- Click Send and Close.
Based on the selection(s) in step 5, a message is sent to the patient
with the PIN, a link, and instructions on completing the enrollment.
The patient will need an internet connection to complete the enrollment
process.
Additional Methods
to generate PIN
From multiple places within Centriq, the caregiver can generate the
PIN letter that can be given to the patient to complete the patient portal
registration process. The following locations have a Generate
Patient Portal PIN button. Click this button to display the letter
that includes a PIN that can be printed and given to the patient:
- Quick View
- Quick Registration
- Medical Summary
Next Steps for the Patient
This section discusses what happens next for the patient to complete
their enrollment, from home or other location with internet access, after
they receive their PIN information via text message and/or Email.
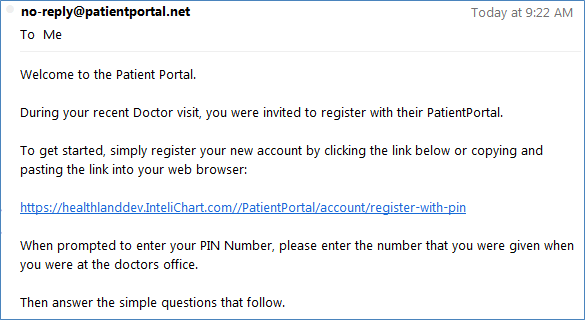
- The patient receives the welcome Email (produced from the actions
taken in To
register activate a patient for the Portal). [+]
- The patient clicks the link contained in the Email. The Patient
Portal Registration screen is displayed.
- The patient follows the instructions on screen to complete 2 steps:
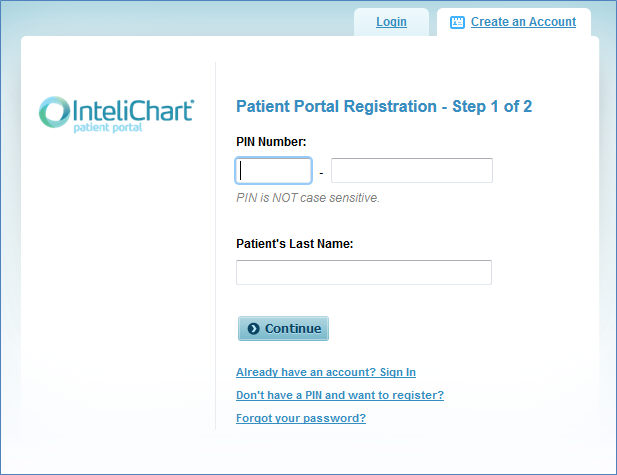
- Step 1 screen: Enter
the PIN Number and Patient Last Name, then click Continue. [+]
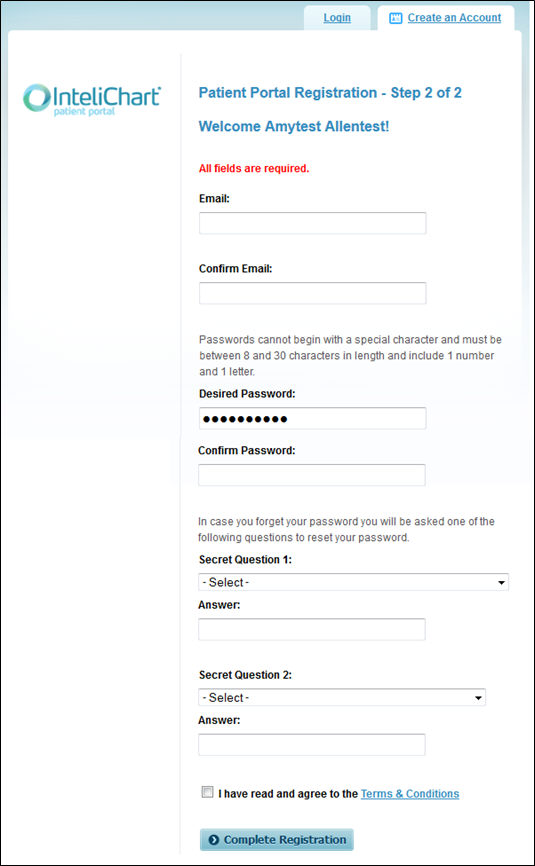
- Step 2 screen: Enter
Email (and
Confirm Email),
enter Desired
Password
(and Confirm Password), select secret questions and answers, agree
to the Terms & Conditions. Then, click Complete
Registration.[+]
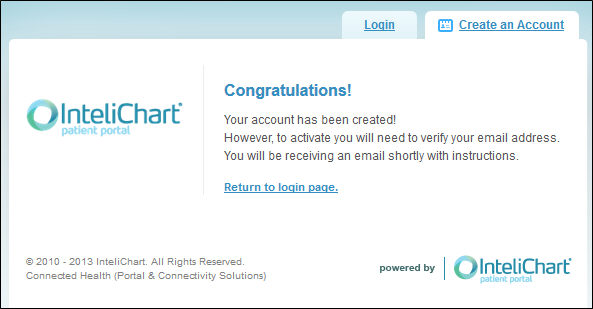
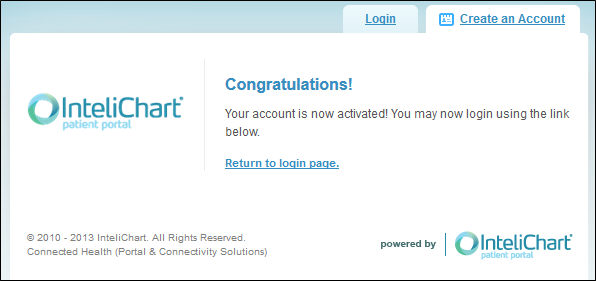
- The Congratulations! screen
is displayed.[+]
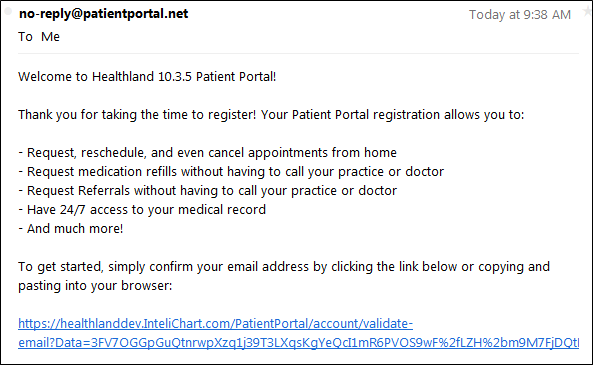
- The patient receives an Email with a link to confirm the Email
address. [+]
The patient must confirm the Email address to get started in the portal.
- After clicking the link to confirm the Email address, an InteliChart
window is displayed that indicates the account is activated. [+]
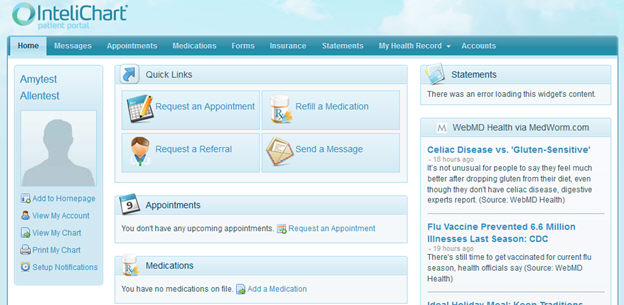
The patient can now log in and review their electronic health information,
including visits, medications, problems, labs. In addition, the patient
has the ability to send a message to their provider.[+]
Maintenance
There are maintenance items associated with the use of the Patient Portal,
powered by InteliChart. See the Maintenance
section for details.
Additional Resources
There are additional resources related to the Patient Portal in Learning
Depot. There are training assets for you and your facility, as well, as
documents that your facility can use to re-brand and distribute to your
patients. You can find these documents in Learning Depot using the following
links:
Patient
Portal (InteliChart) Course Assets
Marketing
the Patient Portal to your Patients (for Hospitals/Clinics)