The Wage Codes master file allows you to set up how you pay employees for the tasks they perform. Examples of wage codes include: regular, overtime, salaried, vacation, PTO hours, etc.
To access the Wage Codes window, go to Payroll > Master Files > Wage Codes. [+]
The following tasks can be performed from this window:
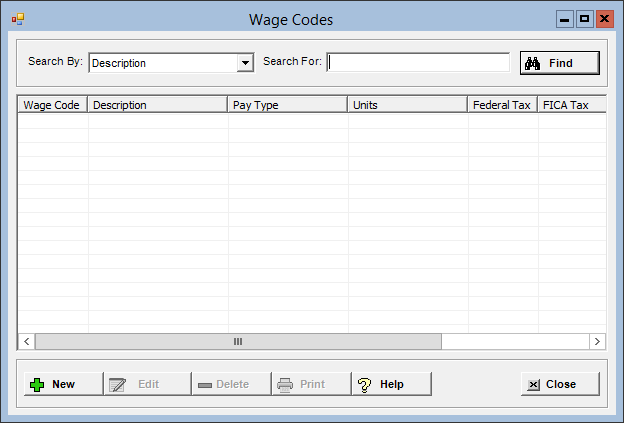
To display all wage codes on file, click Find without entering any search criteria. The grid displays the wage codes by Description in alphanumeric order. You can click any column heading to sort the list based on that column. Click the column heading again to reverse the order (i.e., ascending or descending).
Change or narrow your search results by entering specific search criteria:
In the Search By field, use the drop-down list to select how you want to search the list and sort the results. Select from the following sort options: Description, Pay Type, or Wage Code.
In the Search For field, enter the specific term to search for based on the Search By field choice. Enter all or part of the term (or, if a drop-down list displays, select an option) to retrieve all records that match the criteria.
Click Find to display the search results in the grid.
Click New located at the bottom of the of the Wage Codes window. The Add Wage Code window is displayed. [+]
In the Code field, enter a unique, three-character alphanumeric code to assign to the wage.
In the Description field, enter a full-text description of the wage code that is printed on check stubs, direct deposit forms, and reports.
In the Types of Units field, use the drop-down list to select the option that identifies how the wage code is allotted. Choose 1 - Hours or 2 - Units. Units would be used for scenarios such as commissions.
In the Pay Type field, use the drop-down list to select the option that identifies how the wage codes are grouped for reporting and for the calculation of overtime and taxes. Choose from the following options:
1 - Hourly
2 - Time and 1/2
3 - Double Time
4 - Salary
5 - Hours bank use
6 - Holiday
7 - Other
8 - Commission
9 - Bonus
A - Other nonwork
B - Tips Reported
C - Tips Paid
D - Tips Allocated
E - Other Avg Rate
F - Half-Time Premium
The E - Other Avg. Rate pay type can be used for calculating the average OT rate for premium meal hours.
If using the F - Half Time Premium pay type, be sure to review your Time and Attendance or manual time entry practices as the half-time premium pay method requires you to enter time using both the regular rate wage codes and the half-time premium wage codes for hours that are to be paid at time and a half. For example, 48 hours regular and 8 hours OT; the OT will be at the half time rate. See the Time and Attendance Application Help for detailed instructions.
The following pay types are
used for employees who are allowed to enter special hours in Time Entry:
- 5 - Hours bank use for entry
of time off (PTO hours)
- A - Other for entry of other
hours
- 2 - Time and 1/2, 3
- Double Time, or F - Half-Time
Premium for entry of overtime hours
See the Time and Attendance Application
Help for detailed instructions on how to set up and enter special
hours.
In the Default Rate field, enter the default hourly rate or salary for this wage code.
The following options in the Overtime Regular Rate Calculation section are used to determine how the wage code contributes hours and/or dollars to the overtime rate calculation:
Include Dollars - Check this box to include dollars for this wage code in the overtime rate calculation.
Include Hours - Check this box to include hours for this wage code in the overtime rate calculation.
The following options in the Hours and Wage Reporting section determine how hour and wages are reported:
ACA FTE Contributing: Check this box to direct the wage code hours to the FTE calculation in compliance with regulations 6055 and 6056 of the Affordable Care Act. This calculation uses hours of service to determine your facility's categorization as an employer. This box is checked by default and indicates that the wage code is included in the ACA FTE calculation. Uncheck the box if the wage code is not to be included in the ACA FTE calculation.
EEO-1 Contributing: Check this box to indicate the wage code is to be counted as "worked hours" for EEO-1 reporting purposes. This check box is enabled when the EEO-1 option is selected in the EEO Reporting field in Payroll System Parameters.
EEO-4 Contributing: Check this box to indicate the wage code is included in EEO-4 reporting. This check box is enabled when the EEO-4 option is selected in the EEO Reporting field in Payroll System Parameters.
The following options in the Taxes section determine the taxes that will be calculated for this wage code, and whether hours for this wage code are included in non-financial journal entries. Check the appropriate boxes as needed. NOTE: The Federal, FICA, State, and Local fields cannot be edited if this wage code has check history.
Federal Tax: Check this box if this wage is taxable by the federal government.
FICA: Check this box if FICA and Medicare need to be calculated for this wage code.
State Tax: Check this box if state taxes should be calculated for this wage code.
Local Tax: Check this box if local taxes should be calculated for this wage code.
Include Hours in Nonfinancial JE’s: Check this box to include hours for the wage code in non-financial journal entries.
In the Wage State field, click the Search button to select the state where the wage code is calculated.
In the Unemployment State field, click the Search button to select the state where unemployment taxes are calculated for these wages.
In the Rate Based on Another Wage Code section, enter the following information if this wage code's pay rate is dependent on another wage code. For example, a night shift rate may be the day shift rate plus $0.50 or one percent (1%).
In the Base Wage Code field, click the Search button to select the original wage code.
In the Base Percent field, enter the base percentage to use with the selected Base Wage Code to determine the rate for the new wage code.
In the Base Amount field, enter the base amount to use with the selected Base Wage Code to determine the rate for the new wage code.
Either the Base Percent or Base Amount must have a value greater than 0 (zero). If not, then the message, Base Percent or Base amount should be non zero is displayed upon saving the file.
The Hour Bank Rate section is available when the Pay Type field is set to 5 - Hours Bank Use. Select one of the following options that will determine how to calculate the hourly pay rate (e.g., for sick pay):
Time Entry Rate (default) - Calculates the rate of pay for the wage code based on the rate of pay used in the time entry record.
Calculate Regular Rate - Calculates the rate of pay for the wage code as the Regular Rate of Pay (RROP). This method uses the Overtime Regular Rate of Pay settings for the wage code to determine applicable hour and dollars.
Calculate Average Rate - Calculates the rate of pay for the wage code based on the Hour Bank Pay Rates master file settings.
The Active check box defaults to checked, indicating that the wage code is available for use in the Centriq system. Uncheck the box to make the wage code unavailable/inactive.
Click Save to save the wage code and close the window, or click Cancel to close the window without saving.
When a wage code is deactivated, hours can no longer be added to the wage code. Be aware, if the wage code is deactivated after the employee's time is already entered, those hours are shown in the Direct Deposit Voucher; however, the hours will not be included in the direct deposit export file.
The Edit button allows you to edit the wage code field values, or change the active/inactive status of the wage code.
In the Wage Codes window, find and select the wage code that you want to edit.
Click Edit. The Edit Wage Code window is displayed.
Edit the fields as needed; refer to the field descriptions from To create a wage code (above).
Click Save to save your changes and close the window, or click Cancel to exit without saving.
Follow the instructions below to delete a wage code from the master file if it is not in use. NOTE: You can also choose to deactivate the wage code, rather than delete it, by unchecking the Active box in the edit screen.
In the Wage Codes window, find and select the wage code that you want to delete.
Click Delete. A verification message is displayed.
Click Yes to delete the wage code, or No to keep it.
Follow the instructions below to display and/or print a list of wage codes on file.
In the Wage Codes window, choose your search criteria and click Find to display the wage codes that you want to print. All records that are visible in the grid will be included in the report.
Click Print. The report is displayed in the Report Viewer, where you can save the list to the PC/network or print the list to an assigned printer. See To preview the report for more information on options within the viewer.
