The Deductions master file allows you to set up the deductions (i.e, for payroll taxes, insurance payments, and 401K plans) to be deducted from the employees' wages when calculating their take home pay. Deductions are set up and then entered on the employee records on the Deductions tab. Standard deductions are automatically calculated in the Payroll application. Variable deductions, such as gift shop and cafeteria charges, are entered during the payroll cycle.
To access the Deductions window, go to Payroll > Master Files > Deductions. [+]
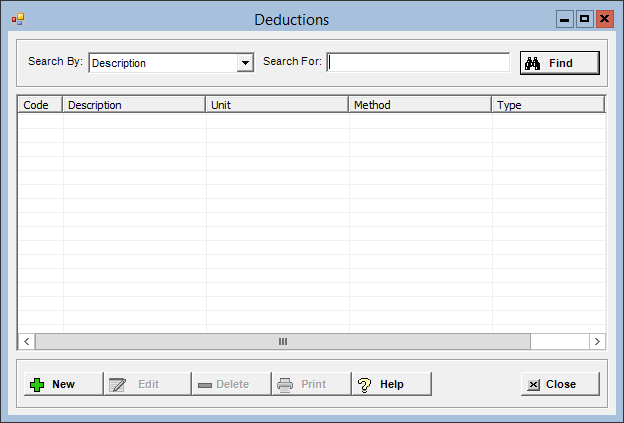
The following tasks can be performed from this window:
To display all deductions on file, click Find without entering any search criteria. The grid displays the deductions by Description in alphanumeric order. You can click any column heading to sort the list based on that column. Click the column heading again to reverse the order (i.e., ascending or descending).
Change or narrow your search results by entering specific search criteria:
In the Search By field, use the drop-down list to select how you want to search the list and sort the results. Select from the following sort options: Description or Code.
In the Search For field, enter the specific term to search for based on the Search By field choice. Enter all or part of the term to retrieve all records that match the criteria.
Click Find to display the search results in the grid.
Click New at the bottom of the Deductions window. The Add Deduction window is displayed. [+]
In the Code field, enter a unique, four-character alphanumeric code that identifies the deduction.
In the Description field, enter a description that identifies the full name of the deduction.
In the Unit field, use the drop-down list to select the option that determines how the deduction is treated in Payroll. Examples include state and federal taxes and 401K plans. Choose from the following options:
1 - Federal Tax
2 - FICA Tax
3 - Medicare Tax
4 - State Tax
5 - Local Tax
6 - 125 Medical Plan
7 - 125 Dependent Care Plan
8 - Deferred Federal/State (IRA)
9 - Deferred Federal/State (401K)
B - Deferred Federal Only
C - SDI
D - 125 Medical Reimbursements
E - 125 Dependent Care Reimbursements
F - AR Payment
Z - Other
(Iowa sites) Separate deductions must be set up for hospital and ambulance employees based on the 9-Deferred Federal/State (401k) unit. See To set up IPERS deductions for different wage codes for more information.
In the Method field, Use the drop-down list to select the option that determines how the deduction is calculated (e.g., per hour, percentage of gross wages plus a flat amount). Choose from the following options:
1 - Rate per hour
2 - Flat Amount and/or Percentage of applicable wages
3 - Tax tables
4 - A flat amount with percentage of net wages limit
5 - Percentage of net wages plus a flat amount
6 - A % of FICA wages plus a flat amount
7 - Percentage of net wages with a minimum wage limit
8 - % of Federal Taxable wages plus a flat amount
9 - % of State Taxable wages plus a flat amount
If you are entering locations/departments to include or exclude for base wage calculations, select Method 2 - Flat Amount and/or Percentage of applicable wages.
The Unit and Method fields cannot be edited if this deduction has check history.
In the Type field, use the drop-down list to select the option that determines the type of deduction. Choose S - Standard deduction (default) or V - Variable deduction.
In the Maximum for Year field, enter the yearly limit for the deduction, if needed. When this limit is reached, the deduction is no longer taken.
In the Maximum for Life field, enter the lifetime limit for the deduction, if needed. When this limit is reached, the deduction is no longer taken.
In the Default Amount field, enter the amount to default for the deduction, if needed. NOTE: This is used in flat amount calculations.
In the Default Percent field, enter the percentage to default for the deduction, if needed. NOTE: This is used in percentage calculations.
In the Default State field, click the Search button to select the state associated with the deduction.
In the Default GL Account # field, click the Find button to open the List of Chart of Accounts window and select the account number to default on the employee's deduction record. This account is used for credit journal entries of deduction liabilities.
Check the Use Maximum in Master rather than employee box to default the maximums in the employee record (e.g., for deductions like SDI in California, the maximum is the same for all employees, and is occasionally changed).
Check the Carryover box to recalculate the lifetime limit for this deduction at the end of each year. This may be necessary if a deduction has a lifetime limit instead of an actual limit. Leave this box checked to have no carryover of totals for this deduction.
Check the Add to 125 Balance box if the employee’s 125 plan is being tracked. This field cannot be edited if this deduction has check history.
Check the Update all Employee deduction with Default Amount or Default Percent when defaults changed to update the Amount or Percent fields on the Employee > Deductions tab for all active employees who have this deduction when the Default Percent or Default Amount field (above) is updated.
The Locality Information section is available when Unit = 5 - Local Tax and Default State = Ohio. In the Locality Code field, click the Find button to select the local tax record for this deduction as set up in the Local Taxes master file. Upon selecting the local tax, the Tax Percent value from the local tax record is displayed in the Default Percent field (above) for this deduction if the Update deduction master Default Percent when Locality Tax Percent box is checked in the local tax record. One locality is allowed per deduction; multiple deduction records are allowed for the same locality. This field cannot be edited if this deduction has check history.
In the Frequency field, use the drop-down list to select the option that determines when a deduction will be included in a payroll cycle. Choose from the following options. NOTE: All tax deductions should be set to 0–Always.
0 - Always
1 - Weekly
2 - Biweekly
3 - Semi Monthly
4 - Monthly
5 - Quarterly
9 - Special
In the Vendor field, click the Find button to select the vendor (as set up in the Accounts Payable application) to have an invoice generated for the total liability into AP Invoice Entry when payroll checks are posted.
The Active check box defaults to checked, indicating that the deduction is available for use in the Centriq system. Uncheck the box to make the deduction unavailable/inactive.
Depending on the selected unit and method, you can indicate which wages (wage codes) should be excluded from the calculation if needed. See To exclude wage codes below.
Click Save to save the deduction and close the window, or click Cancel to close the window without saving.
The Exclude Wage Codes option allows you to specify the wage codes to be excluded from calculation. This option is available for the following scenarios:
Units 9-Deferred Federal/State (401k) or Z-Other, and the deduction is calculated using method 2-Flat amount plus percentage of gross wages.
Unit Z-Other and the deduction is calculated using the 1-Rate per hour method.
Click the Exclude Wage Codes button. The Wage Exclusions window is displayed.
Click the Search button to select the valid wage code(s) that you want to exclude from the calculation.
Click Save to close the window and return to the Deductions window, or click Cancel to close without saving.
To remove a wage code, right-click on the wage code and select Delete. You are not allowed to edit or remove wage codes if the deduction has check history. The following message is displayed if the deduction is in use: This deduction master record is associated with existing check history. To maintain an accurate audit trail, this row cannot be removed.
If an exclusion was done in error, and you want to remove the newly-added row before processing your next payroll, contact Support for assistance.
The Include/Exclude Departments option is available for specifying the locations/departments to have wages included or excluded in the base wage calculation for 9-Deferred Federal/State (401k) deductions.
Click the Include/Exclude Departments button. The Wage Exceptions window is displayed.
Use the Search buttons in the Location and Department fields to select the appropriate location(s) and department(s).
In the Include/Exclude column, select whether to include or exclude the location/department. NOTE: All location/department selections must be set to Include or all to Exclude for this deduction.
Click Save to close the window and return to the Deductions window, or click Cancel to close without saving.
To remove a location/department, right-click on the location/department and select Delete. You are not allowed to edit or remove locations/departments if the deduction has check history. The following message is displayed if the deduction is in use: This deduction master record is associated with existing check history. To maintain an accurate audit trail, this row cannot be removed.
If an exclusion was done in error, and you want to remove the newly-added row before processing your next payroll, contact Support for assistance.
The Edit button allows you to edit the deduction field values or to change the active/inactive status of a deduction.
In the Deductions window, find and select the deduction that you want to edit.
Click Edit. The Edit Deduction window is displayed.
Edit the fields as needed; refer to the field descriptions from To create a deduction (above).
Click Save to save your changes and close the window, or click Cancel to exit without saving.
Follow the instructions below to delete a deduction from the master file if it is not in use. NOTE: You can also choose to deactivate the deduction, rather than delete it, by unchecking the Active box in the edit screen.
In the Deductions window, find and select the deduction that you want to delete.
Click Delete. A verification message is displayed.
Click Yes to delete the deduction, or click No to keep it.
Follow the instructions below to display and/or print a list of deductions on file.
In the Deductions window, choose your search criteria and click Find to display the deductions that you want to print. All records that are visible in the grid will be included in the report.
Click Print. The report is displayed in the Report Viewer, where you can save the list to the PC/network or print the list to an assigned printer. See To preview the report for more information on options within the viewer.
