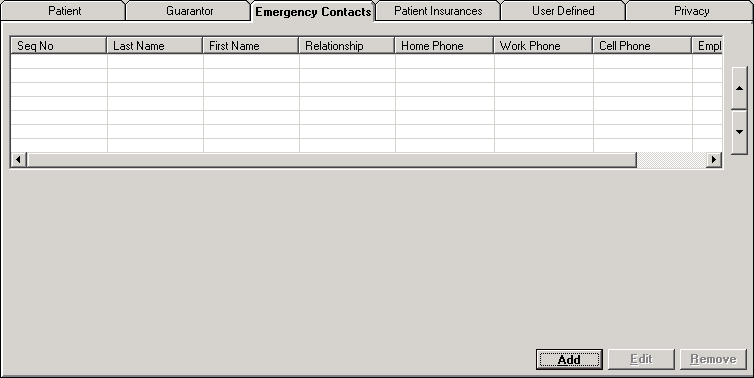
The Emergency Contacts tab of the Master Patient Index contains contact information about individuals the patient has named be contacted in the event of an emergency. A patient may have an unlimited number of emergency contacts, although only two will print on the face sheet form. [+]
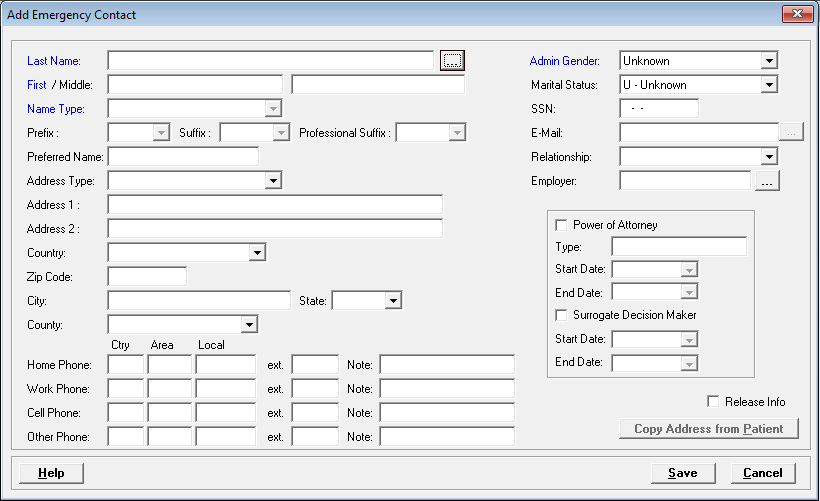
On the Emergency Contacts tab, click Add. The Add Emergency Contact window is displayed. [+]
In the Last Name field, click the ellipsis search button to open the Name window. Enter your search criteria to locate the person in the People table.
If the contact is found, select the name from the table and click Select to populate the contact's information in the Add Emergency Contact window. NOTE: A message is displayed if the contact has already been selected as the patient's emergency contact. Click Yes to overwrite the emergency contact record or click No to select a different contact.
If the contact is not found, click New to add the contact to the People table. See the People master file for detailed instructions. Once entered, you are returned to the Name window. Highlight the contact and click Select to populate the contact's information in the Add Emergency Contact window.
The Last Name, First Name, Middle Name, Name Type, Prefix, Suffix, Professional Suffix, and Preferred Name field values are displayed based on the selected contact and are read-only.
In the Address Type field, use the drop-down list to select one of the following options that describe the address. Defaults to H-Home.
B - Firm Business
BA - Bad Address
BDL - Birth Delivery Location (address where birth occurred)
BR - Residence at Birth (home address at time of birth
C - Current or Temporary
F - Country of Origin
H - Home
L - Legal Address
M - Mailing
N - Birth (birth address not otherwise specified
O - Office
P - Permanent
RH - Registry Home
Enter the contact's Address, Country, Zip Code, City, State, and County in the fields provided. NOTE: In cases when the contact has the same address as the patient (e.g., the contact is the parent or spouse), click Copy address from Patient to copy the address from the patient’s Demographics tab. Note the following about the address fields:
Two Address fields are provided to record two addresses, e.g., mailing address and physical address.
By entering the Zip Code first, the City and State fields will populate unless the zip code is not in the Zip Codes master file. A message is displayed if the zip code is unknown, in which case, manually enter the city and state.
The County and Country fields are populated from the zip code if they are linked via the Zip Codes master file. If not linked, then use the drop-down lists to select the appropriate county and country. USA will default as the country if no country was assigned to the zip code.
Changes to the Address/Address Type in this screen update the primary address of the contact's record in the People master file.
Enter the contact's Home Phone, Work Phone, Cell Phone, Other Phone, and Fax information in the corresponding fields, including country code, area code, 7-digit local number, extension, and notes.
Phone numbers are formatted as 1-123-456-7890 with the area code required. The country code is defaulted to 1 (for USA) if not entered.
In the Admin Gender field, use the drop-down list to select the contact's gender. Valid options are Female, Male, Unknown, or Other.
In the Marital Status field, use the drop-down list to select the contact's marital status. Valid options are: D-Divorced, M–Married, P–Life Partner, S–Single, U–Unknown, W–Widowed, and X-Legally Separated.
In the SSN field, enter the contact's Social Security Number.
In the E-Mail field, click the ellipsis button to enter, edit, or remove the contact's e-mail information. The E-Mail Information window is displayed.
Edit the E-Mail Address, E-Mail Type (Home, Work, Other), and E-Mail Comment fields as needed. The E-Mail Type and E-Mail Comment fields are enabled only when an e-mail address is entered.
If the emergency contact has no e-mail address, check the Does not have an e-mail address box. NOTE: If this box is checked, the text, No e-mail address, is displayed in the E-Mail field on the Emergency Contact tab, and the registration clerk is not prompted to ask for the e-mail address.
Click OK to save your changes and return to the Add Emergency Contact window, or click Cancel to exit the window without saving.
NOTE: This information is not required unless specified in the Customize Required Fields master file. The edited information is not permanently saved until Save is clicked on the Edit MPI screen. (This is a Meaningful Use requirement.)
In the Relationship field, use the drop-down list to select the emergency contact's relationship to the patient (e.g., Father, Mother, Spouse, Attorney, etc.).
Relationship codes are validated based on a master table of codes. The message, Emergency Relationship requires updating - select the correct Relationship value from the selection list. Previous value was: xxxxxxxxx, is displayed for an invalid value. Click OK and select a valid relationship from the drop-down list.
In the Employer field, click the ellipsis search button to open the Employers window to select the contact's employer. Enter your search criteria to locate the employer. If found, select the employer and click Select. If the contact's employer is not set up in the Employer file, click New and add the employer. See Employers for detailed instructions.
Check the Power of Attorney box to specify this contact as the patient's Power of Attorney. Enter the type of Power of Attorney (in the Type field), and specify the Start and End Date field values.
Check the Surrogate Decision Maker box to specify this contact as the patient's Surrogate Decision Maker, and specify the Start and End Date field values.
Check the Release Info box if this emergency contact is allowed access to the patient's medical information. NOTE: This information appears in the Patient Inquiry window (accessible by clicking the Patient Inquiry button on the main Patient Registration screen).
Click Save to save the contact and display it on the Emergency Contacts tab.
Use the up and down arrows located to the right of the list to rearrange the order of the emergency contacts to ensure the primary contact is listed at the top. Select the contact and use the up arrow to move that name up in the list or the down arrow to move the contact down in the list.
On the Emergency Contacts tab, select the emergency contact and click Remove, or right-click and select Remove. To remove multiple rows of contacts at one time, press and hold <Ctrl> and select each contact that you want to remove. Then, click Remove, or right-click and select Remove.
A confirmation message is displayed. Click Yes to remove the contact or click No to keep the contact.
On the Emergency Contacts tab, select the contact and click Edit, or right-click on the contact and click Edit. The Edit Emergency Contact window is displayed.
Edit the information as necessary. NOTE: You are not allowed to change values in the Name fields.
Click Save.