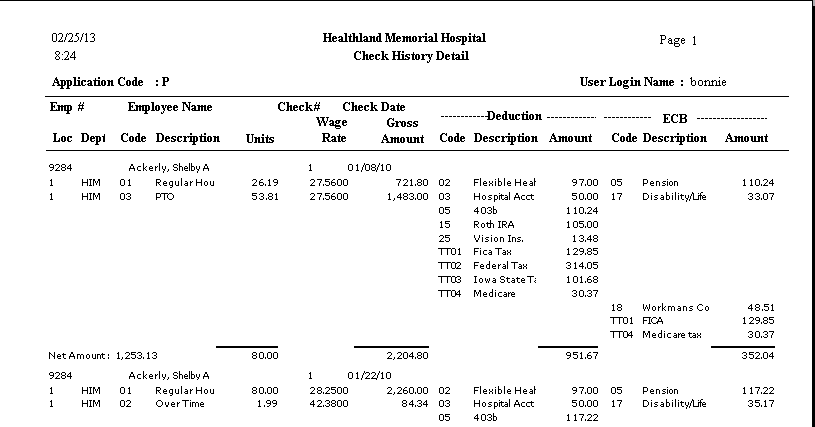
The Check History Details report shows all the wages, deductions, ECB amounts, and net pay for each selected employee for the time period selected. The payroll clerk or supervisor can print this report for an employee who needs to show verification of employment for a given period.
To access the Check History Details window, go to Payroll > Reports > Check History Details. [+]
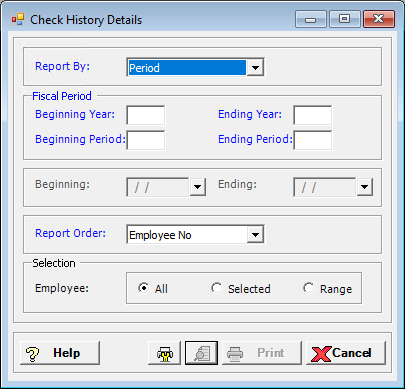
In the Report By field, use the drop-down list to select the option to base the report. Choose from the following options:
Period - (default) To show check history based on the selected fiscal time period.
Check Date - To show check history based on the selected range of check dates.
Period Ending Date - To show check history based on the selected range of period ending dates.
Choose from the following options based on the Report By selection:
If reporting by Period, enter the time period to include in the report. Enter the first fiscal year of the range in the Beginning Year field, and the last fiscal year of the range in the Ending Year field. Enter the first fiscal period of the range in the Beginning Period field, and the last fiscal period of the range in the Ending Period field.
If reporting by Check Date, enter a range of check dates to include in the report. By default, the current date is displayed. To run the report for a different or longer period of time, enter the first date of the range in Beginning Date field, and the last date of the range in the Ending Date field. Use the drop-down calendar in each field to select the date. The ending date must be equal to or greater than the beginning date.
If reporting by Period Ending Date, enter a range of period end dates to include in the report. By default, the current date is displayed. To run the report for a different or longer period of time, enter the first date of the range in Beginning Date field, and the last date of the range in the Ending Date field. Use the drop-down calendar in each field to select the date. The ending date must be equal to or greater than the beginning date.
In the Report Order field, use the drop-down list to select how to sort the report. Choose from the following options:
Employee No. - (default) To print in alphanumerical order by employee number.
Employee Alpha - To print in alphabetical order by employee name.
Department - To print with a break on location and department.
In the Employee field, specify the employees to include in the report. Choose All (default), or choose Selected or Range to specify which ones to include. See Reporting/Printing Functions for detailed information on using the Selected and Range options.
Click the Preview button (located to the left of the Print button) to view the Check History Detail Report in the Report Viewer, or click Print to print the report to the designated printer. See Reporting/Printing Functions for detailed information on using the Printer Settings and Print Preview buttons.
Click Cancel to exit.
Check History Detail Report Example