The EEO-1 Setup window allows you to enter the company data necessary for EEO-1 reporting, and to map Centriq Payroll positions to EEO-1 job classifications that will default to the employee masters (based on the Override flag).
The EEO-1 Report requires company employment data to be categorized by race/ethnicity, gender, and job category. The EEO-1 master file consists of the following tabs that store the components for the EEO-1 Report:
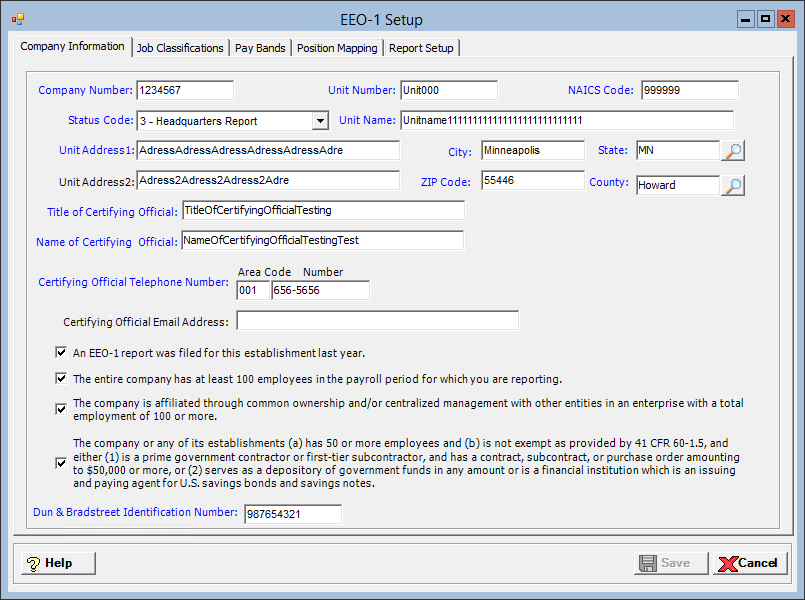
Company Information tab: This tab is used to enter your company information required for EEO-1 reporting.
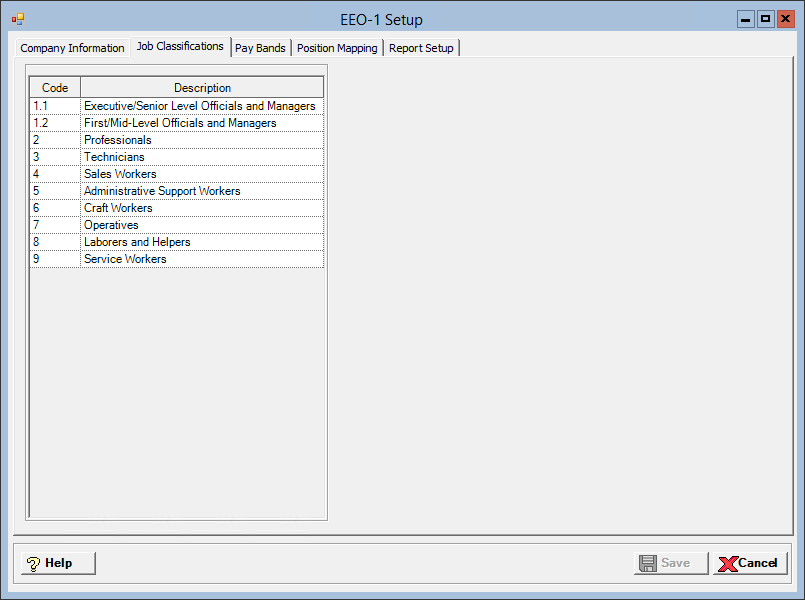
Job Classifications tab: This tab displays pre-loaded classification codes and descriptions into which an employee might be assigned. (View-only)
Pay Bands tab: This tab displays pre-loaded pay bands into which an employee might be assigned on the EEO-1 report. (View-only)
Position Mapping tab: This tab is used to assign EEO-1 job classifications to each position in Payroll. This mapping is used as the default classification assigned to each employee based on their primary position.
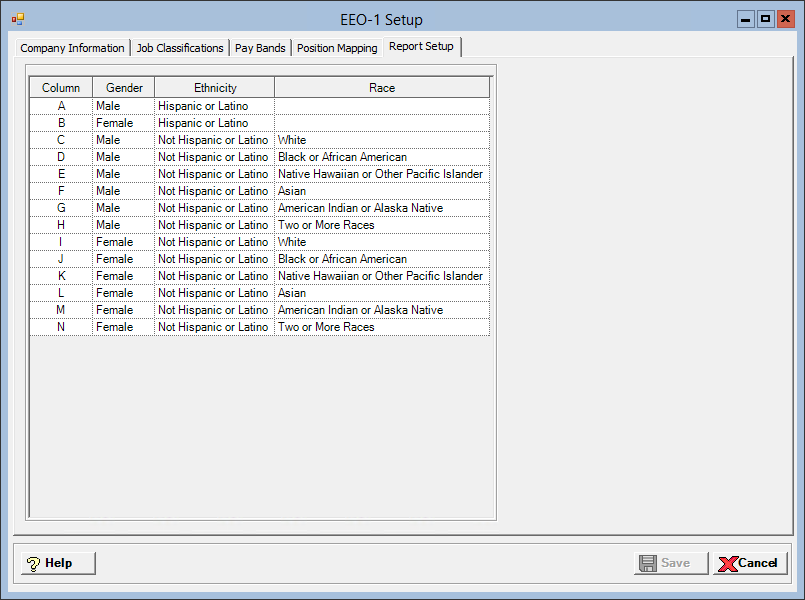
Report Setup tab: This tab displays pre-loaded combinations of gender, ethnicity, and race that an employee might be assigned, and the corresponding EEO-1 report column (A through N).
Refer to the https://www.eeoc.gov/ website for more information regarding the EEO-1 Report.
Prerequisite: The EEO-1 option must be selected in the EEO Reporting field of the Payroll System Parameters to access the EEO-1 Setup screen. If not selected, the following message is displayed when attempting to access this screen: To enable the EEO-1 reporting features, please select "EEO-1" in the EEO Reporting field in Payroll System Parameters.
To access the EEO-1 Setup window, go to Payroll > Master Files > EEO-1. [+]
On the Company Information tab, in the Company Number field, enter the 7-character company number as assigned by the EEOC. This is a unique identifier for the entire company.
In the Unit Number field, enter your 7-character unit number as assigned by the EEOC. NOTE: The Unit Number is required when the Status Code = 1, 2, 3, 4, or 5; otherwise this field is optional.
In the NAICS Code field, enter the 6-character North American Industry Classification System (NAICS)code for your business.
In the Status Code field, use the drop-down list to select the status code that identifies the type of EEO-1 report you are filing. Choose one of the following options:
1 - Single-Establishment Employer
2 - Consolidated Report - Includes all employees in the fifty (50) states and the District of Columbia, including employees working at establishments employing fewer than 50 employees.
3 - Headquarters Report - Includes only those employees working at the main office site of the company.
4 - Establishment Report - Establishments employing 50 or more employees.
5 - Special Reporting Procedure
8 - Status Code 8 Report - For establishments employing fewer than 50 employees.
9 - Status Code 9 Report - Use Status Code 9 for each establishment that is being reported for the first time (NEVER ASSIGNED A UNIT NUMBER), and has 50 or more employees.
In the Unit Name field, enter the name of the reporting establishment.
Enter the reporting establishment's address in the fields provided (i.e., Unit Address 1, Unit Address 2, City, State, ZIP Code, and County).
Enter the Certifying Official's name, title, and contact information in the fields provided (i.e., Title of Certifying Official, Name of Certifying Official, Certifying Official Telephone Number (10 characters, XXX-XXXX), and Certifying Official Email Address). NOTE: Certification is the final stage in the EEO-1 application process by which an authorized official confirms the reported company information.
Check the following boxes as applicable to your facility:
An EEO-1 report was filed for this establishment last year.
The entire company has at least 100 employees in the payroll period for which you are reporting.
The company is affiliated through common ownership and/or centralized management with other entities in an enterprise with a total employment of 100 or more.
The company or any of its establishments (a) has 50 or more employees and (b) is not exempt as provided by 41 CFR 60-1.5, and either (1) is a prime government contractor or first-tier subcontractor, and has a contract, subcontract, or purchase order amounting to $50,000 or more, or (2) serves as a depository of government funds in any amount or is a financial institution which is an issuing and paying agent for U.S. savings bonds and savings notes.
If the above box is checked, enter your unique 9-digit DUNS number in the Dun & Bradstreet Identification Number field.
Select the Job Classifications tab to view the pre-loaded classification codes and descriptions into which an employee might be assigned. The information on this tab is view-only and cannot be edited. [+]
Select the Pay Bands tab to view the pre-loaded pay bands into which an employee might be assigned on the EEO-1 report. The pay band information on this tab is view-only and cannot be edited. Check the Report EEO-1 Component 2 data box to report EEO-1 component 2 data, including pay bands and total hours per employee, during EEO processing. [+]
Select the Position Mapping tab to assign EEO-1 job classifications to each position in Payroll. This mapping is used as the default classification assigned to each employee based on their primary position. [+]
All positions (active and inactive) are listed in the grid. To map a job classification to a position, click the Search button in the EEO Classification column for each position and select the appropriate job classification (based on the Job Classifications tab). NOTE: The same classification can be mapped to multiple positions; however, a position can have only one classification or be left unmapped.
Upon saving the EEO-1 Setup master file, if the Override box is not checked in the Employee Master for the employee, the Job Classification field on the Employee Master > HR & Benefits tab is populated with the mapped job classification based on the employee's primary position. If the Override box is checked for an employee, then the Employee Master is not updated for that employee.
Select the Report Setup tab to view the pre-loaded combinations of gender, ethnicity, and race that an employee might be assigned, and the corresponding EEO-1 report column (A through N). The information on this tab is view-only and cannot be edited. [+]
Click Save to save the EEO-1 settings and close the window, or click Cancel to close the window without saving.